Topic: Email Help

Use Gmail as a Mail Client

Posted on December 2, 2019 by - Email Help

Let’s say you really, really dig the Gmail email interface. You want to use it with all of your email accounts, not just Gmail. Well you’re in luck! Google lets you do that. At least with POP3 accounts they do. Here I’ll show you how to add an Infologistix email account to Gmail. You’ll then be able to send and receive email with your account through the Gmail web interface. (You can click or tap any image to make it larger.)

Be sure to use a computer to complete this task. The email address will be automatically added to the Gmail mobile apps.

This tutorial has 8 steps.

Step 1.

Click on the gear icon and select Settings. Then click “Accounts and Import”. Then look for “Check mail from other accounts” and click the link “add a mail account”

[dropshadowbox align=”none” effect=”lifted-both” width=”auto” height=”” background_color=”#ffffff” border_width=”1″ border_color=”#dddddd” rounded_corners=”false” ][/dropshadowbox]


Step 2.

Add your email address in the field provided and click “Next”.


Step 3.

Click “Next”.


Step 4.

Use your entire email address as the user name. Fill in your password and POP Server (if you’re not sure ask us: email hidden; JavaScript is required) and select port 995. Be sure to check the box next to “Always use a secure connection” (Super Important!) Click “Next”.


Step 5.

You likely want to be able to reply from and send email from the same address it was received at. Check “Yes” and click “Next”


Step 6.

Fill in your from name as you want it to appear in your recipients inbox (anything you want here). Then uncheck the “Treat as an alias” box. Click “Next”.


Step 7.

Fill in the same info from Step 4. Select port 587. Check “Secured connection using TLS”. Click “Add Account”.


Step 8.

Check your Infologistix email account (the one we added here) for the Google confirmation code. Be patient! It will arrive, but sometimes it takes a while. If you lose patience click the “Send again” link (but you only get one more chance!). Enter the code and click “Verify”.


Woohoo! All done. Remember if you need help email us email hidden; JavaScript is required or click the blue help button at the bottom right on this page.
 

Android Email Setup

Posted on July 22, 2019 by - Email Help


Information you will need to complete the setup:

  1. Your email address
  2. Your email password
  3. Your server address (e.g. mail.infolog.ca or mail.infologistix.net)

If you don’t have this contact us email hidden; JavaScript is required and we will provide it

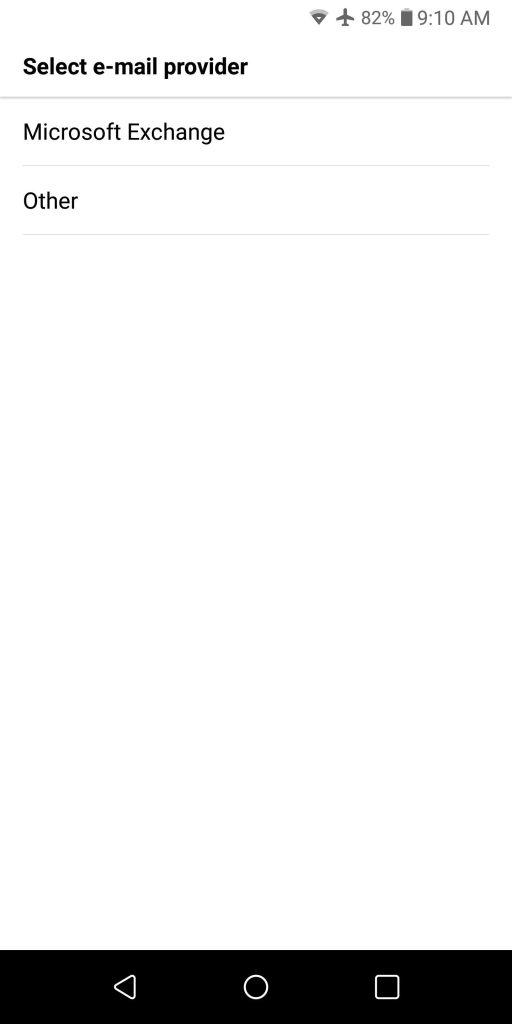
Step 1. Open the native Email app on the Android device. Tap on Other (if you have other accounts in the app you may want to look at slide 9. and then proceed to slide 2.)


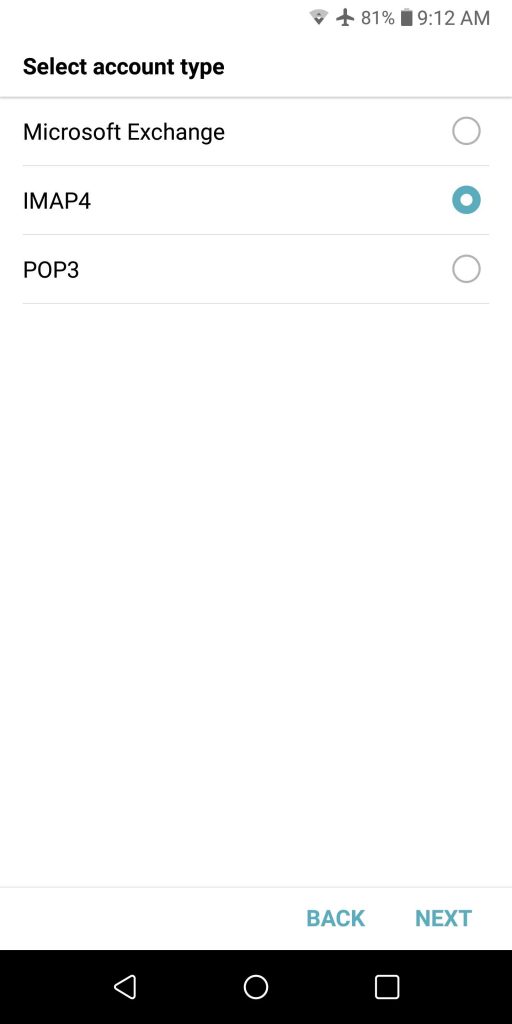
Step 2. Select IMAP4 and then tap NEXT


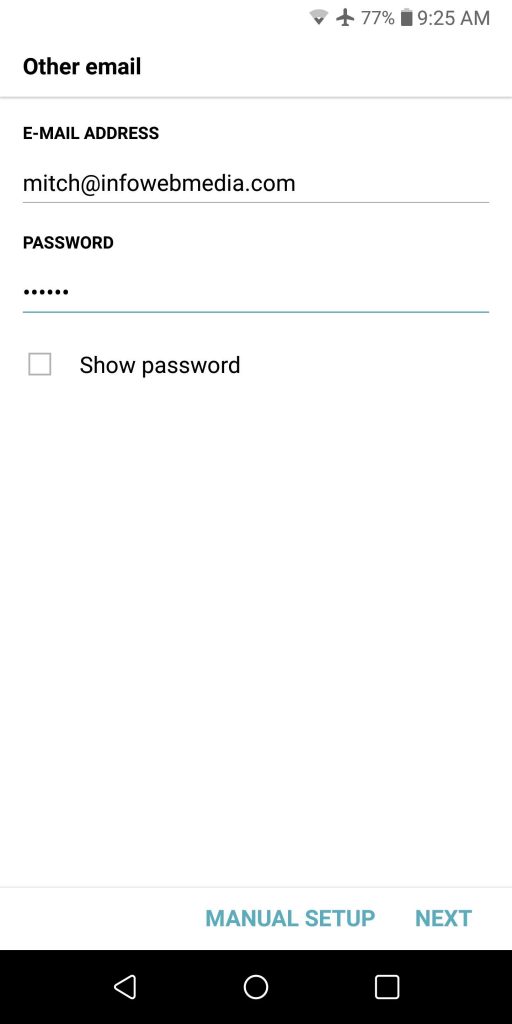
Step 3. Fill in your email address and password and then tap MANUAL SETUP


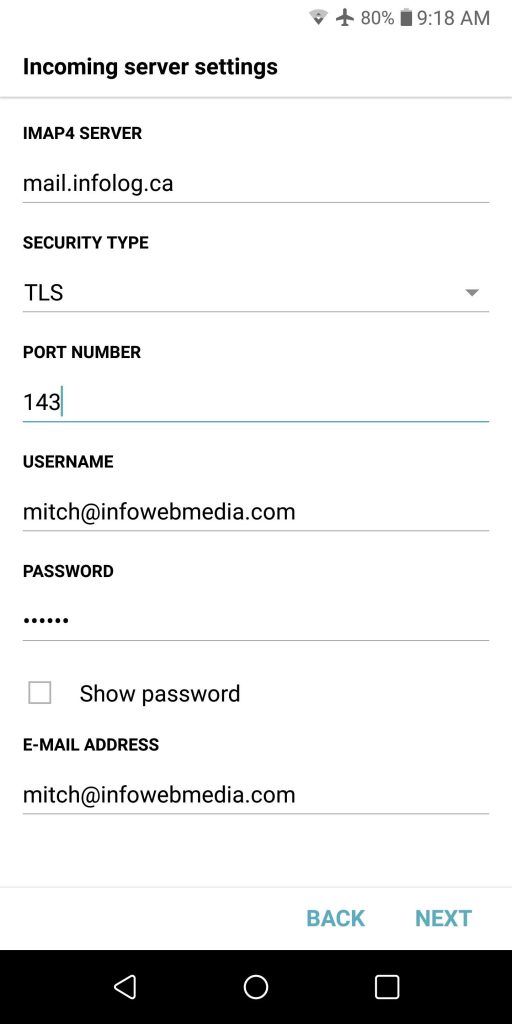
Step 4. Fill in your server address, select TLS for security type and 143 for the port number. The username is your email address. Fill in the password and email address fields with your information from the list you gathered at the top of this tutorial. Once the information is complete and correct tap NEXT.


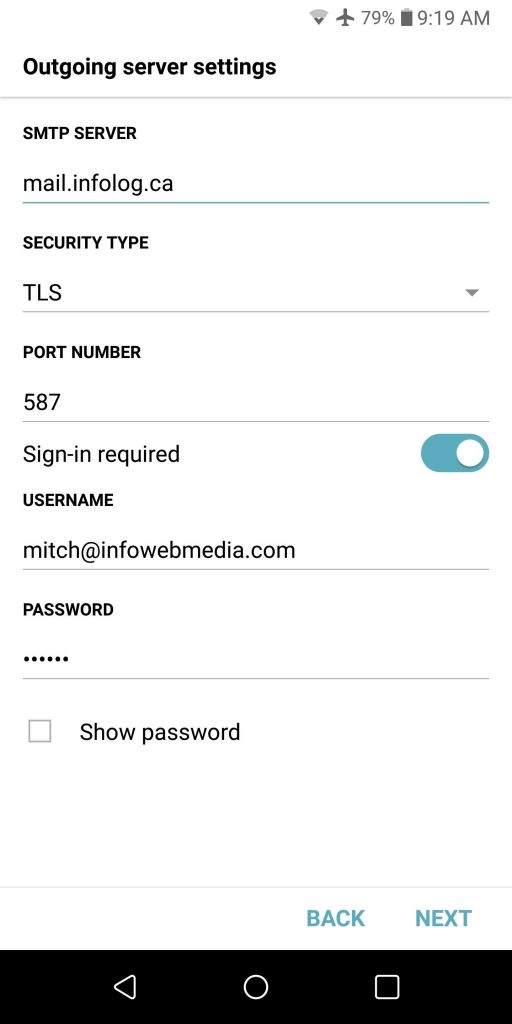
Step 5. Again, fill in the server address, select the security type. The outgoing port is 587. Make sure the username is your email address and toggle the “Show Password” box to ensure your password is correct. Then tap NEXT.


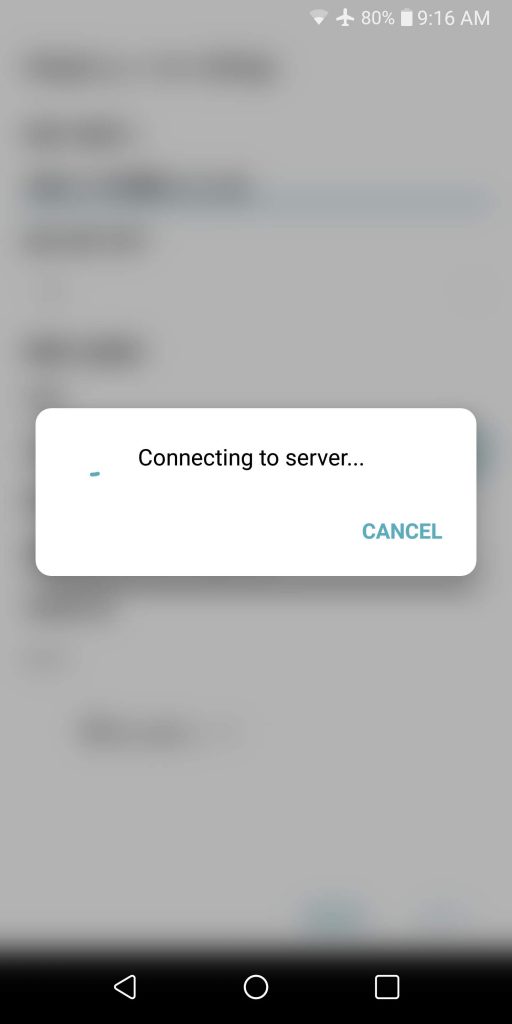
Step 6. The account will be registered on the server.

If you get an error check the settings. If you get errors and the settings look correct quit the process and start over (stop the app and start again, sometimes errors in information get cached and you have to start again to wipe the errors)


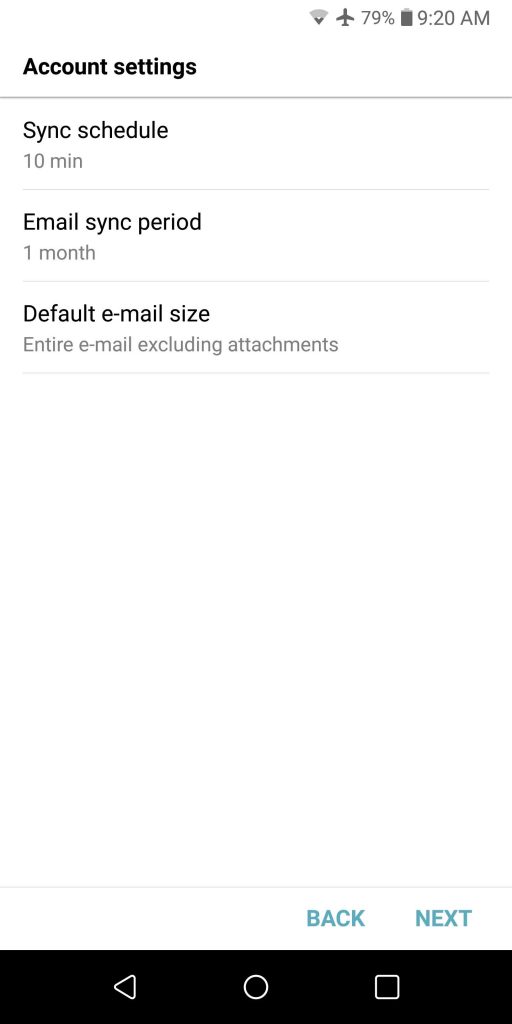
Step 7. It’s important to set the Sync Schedule so the app will automatically check for new mail in the background. The other settings are optional and can be left at default.


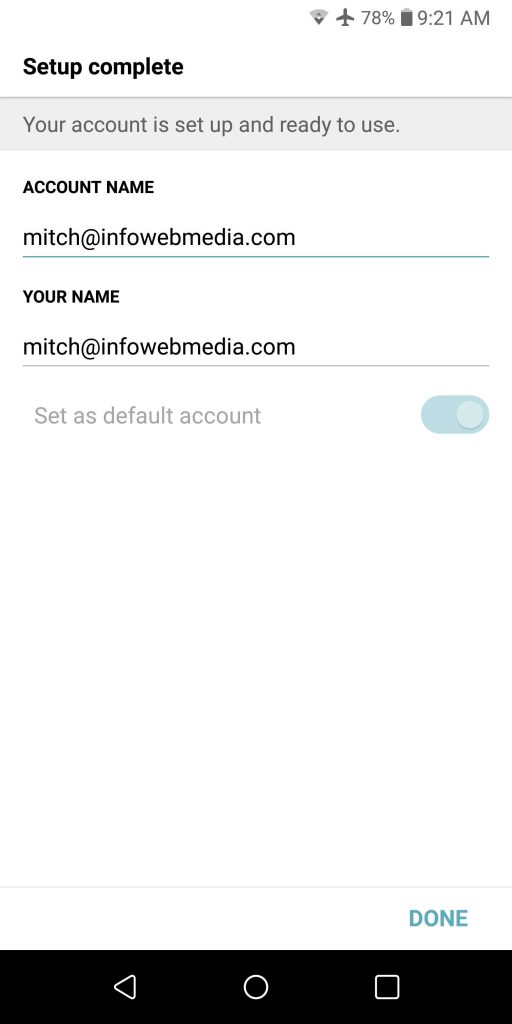
Step 8. Woohoo! It worked. You can set the name of the account to anything you wish, but I like to use my email address. It makes it easier to pick out for future support requests and troubleshooting.


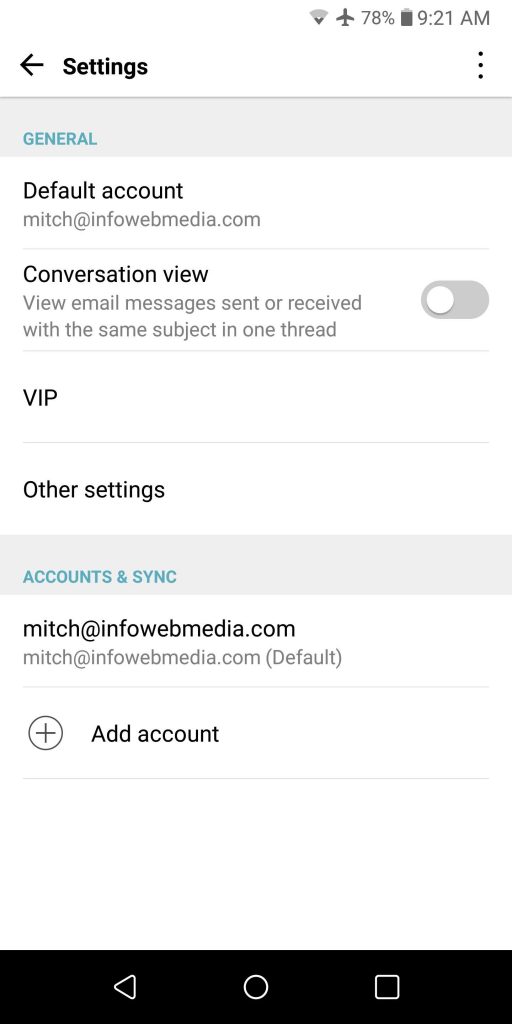
Step 9. Use this slide only if you had other accounts on your phone and you want to add a new one. Tap Add account, and then move back to Step 2. above.

Setup Outlook for Android with IMAP

Posted on April 28, 2018 by - Email Help, Uncategorized

OK you want to add your IMAP email account to Outlook for Android. Here are the steps. For whatever reason Microsoft may not present all of these steps in order. If you don’t see the “next step” image, check the next one, it may be what you see and need to move on:

Step 1:

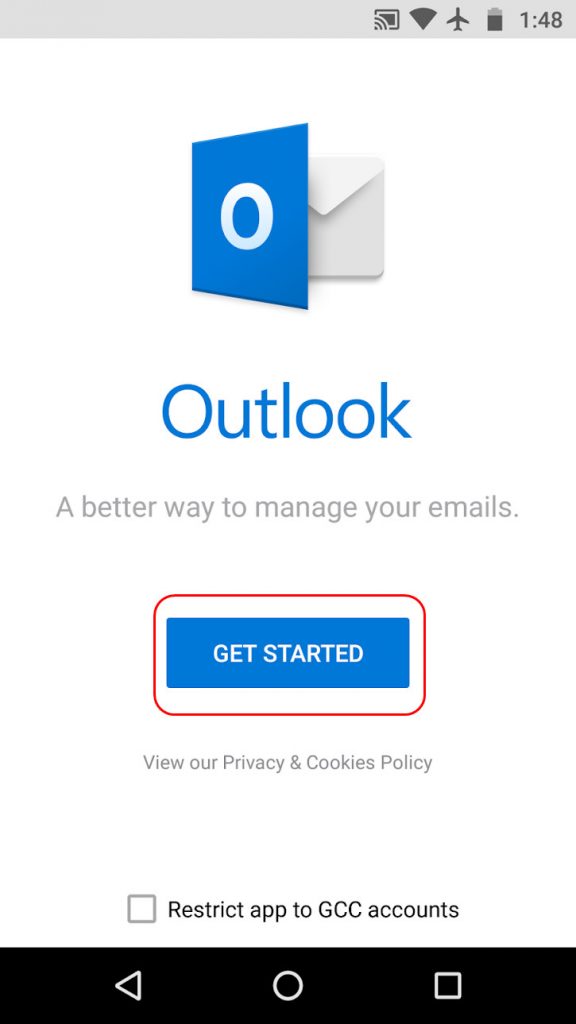
Open the Outlook for Android App and tap on “Get Started”

Step 2:

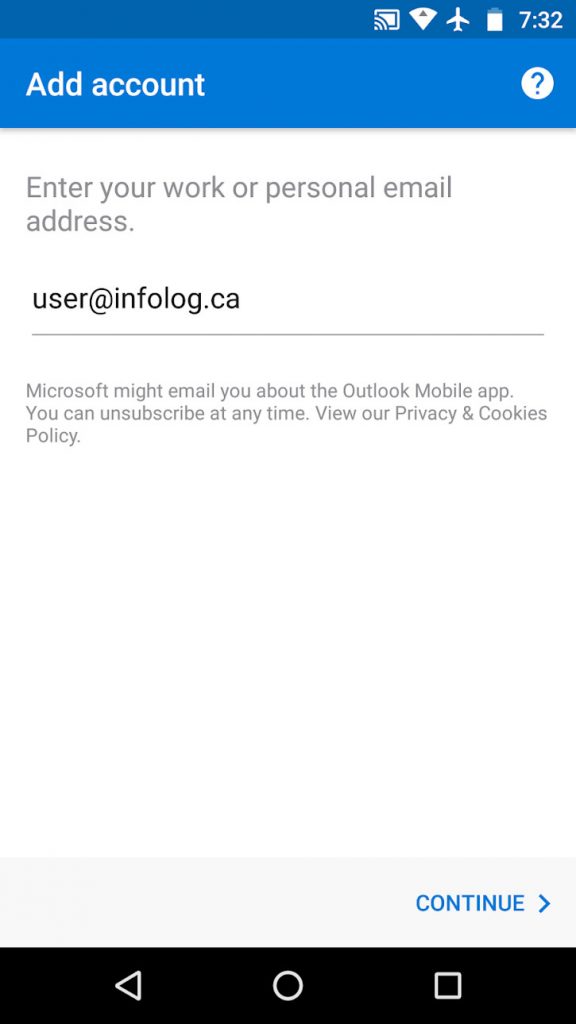
Fill in your email address and tap “Continue”

Step 3:

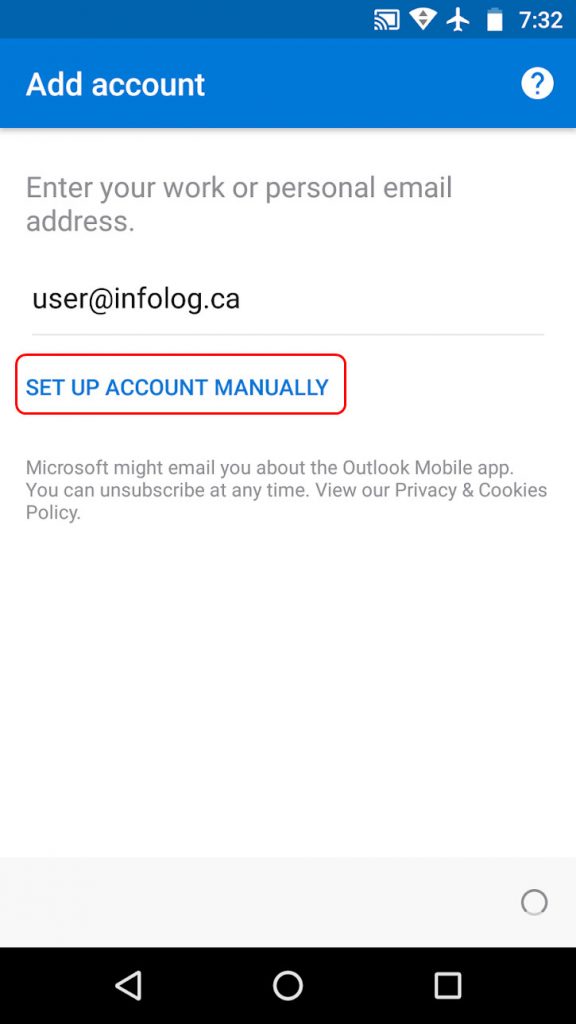
Tap “Set Up Account Manually”

Step 4:

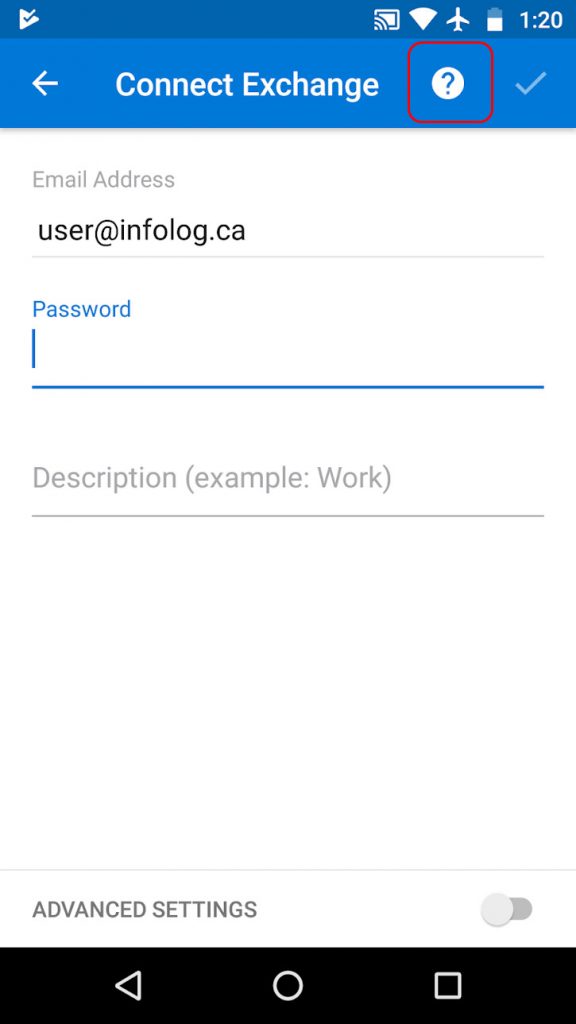
If you see the “Connect Exchange” screen tap the question mark and move on to step 5. If you don’t see this step move on to Step 6.

Step 5:

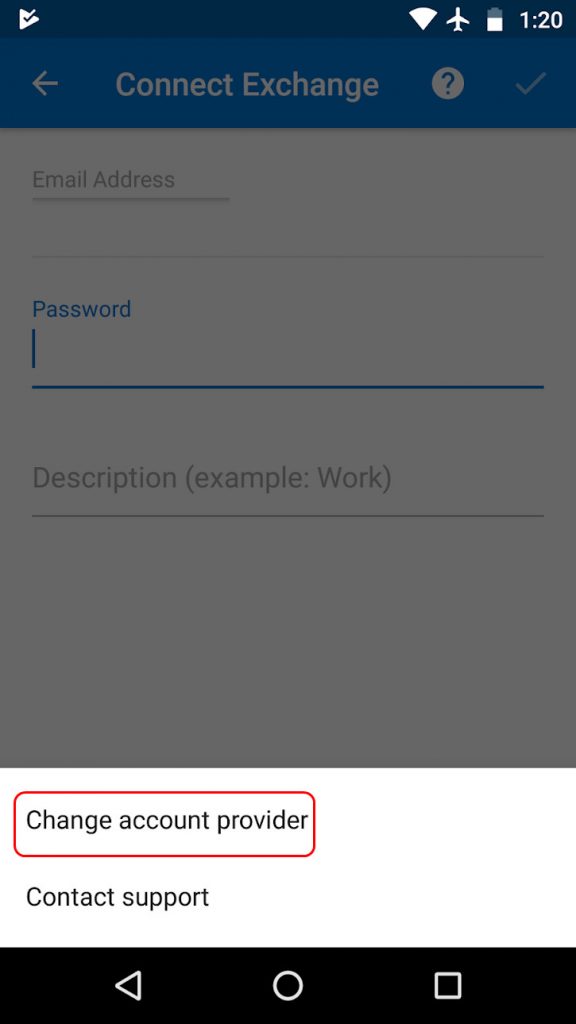
Tap “Change Provider”.

Step 6:

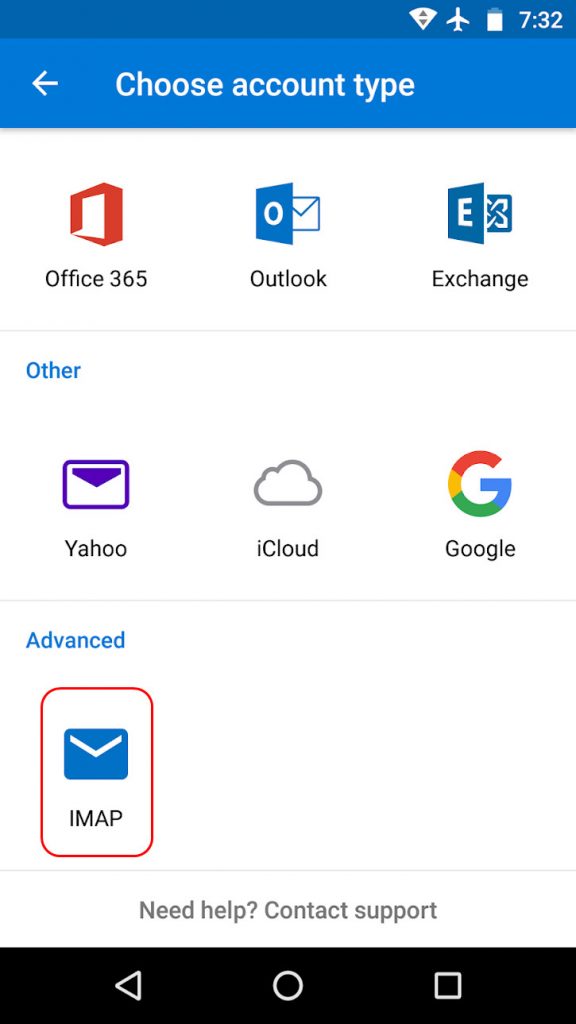
Tap “IMAP”

(BTW it’s not iMAP, it’s an Internet protocol: Internet Message Access Protocol. It’s not an Apple thing.)

Step 7:

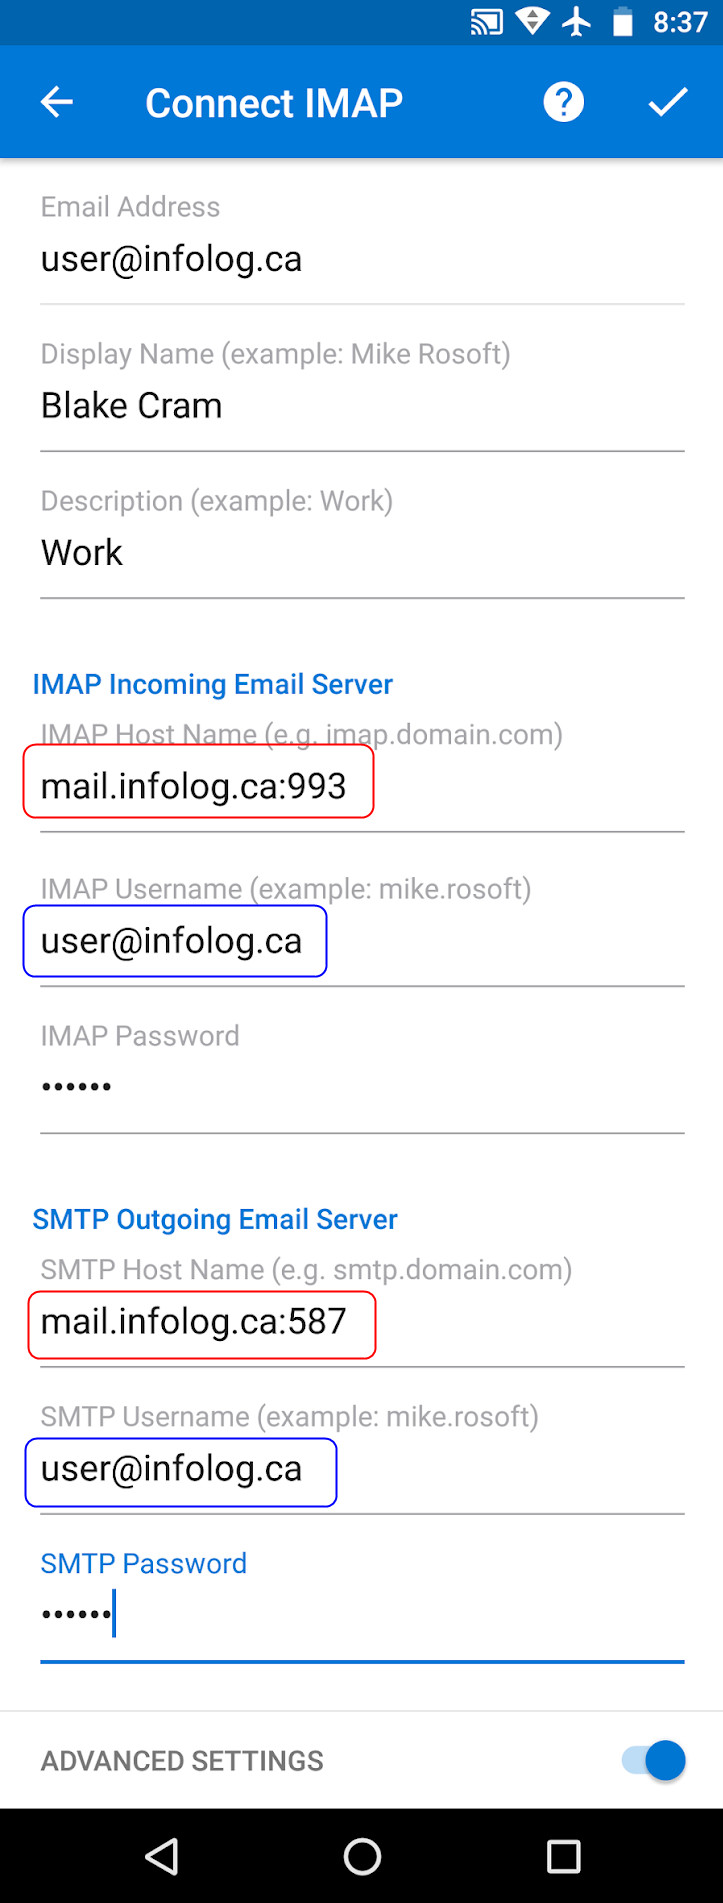
Here’s the critical bit. If Microsoft doesn’t “guess” the port numbers correctly you will need to fill them in. The red boxes have to match exactly what we have here, the blue boxes are your email address.

Step 8:

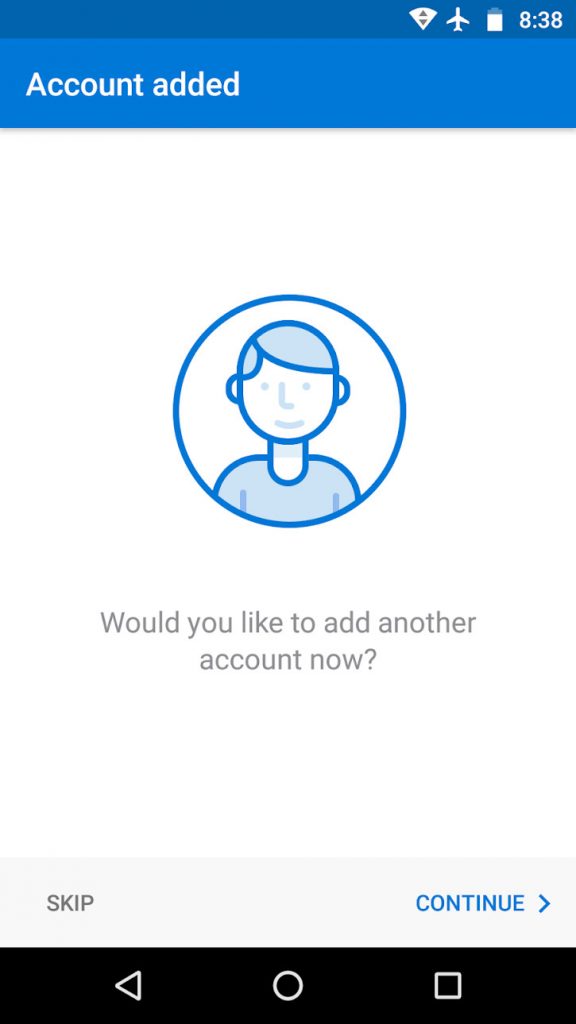
Woohoo! It worked. Tap “Skip” to start using your email or “Continue” to add another email address.

If you get an error hit the Android back button and try again. Check the passwords and spelling. If you tap anywhere else Outlook will not save anything and will force you to start over (frustrating!)

Outlook 2016 IMAP Account Setup

Posted on November 7, 2017 by - Email Help

Here are the steps to setup an IMAP account in Outlook 2016. We are fans of the older, but more reliable Post Office Protocol (POP), but IMAP works great if you want to “sync” folders on different devices. You do, however, need to take care not to accidentally delete some of all of your messages. With IMAP you delete from one device you delete from all “sync’d” devices. Including the server!

If you want to stick with POP3 you can use our POP3 Set up tutorial.

Step 1:

Open Outlook and click “File” from the main menu.


Step 2:

Click “Add Account”.


Step 3:

Fill in your email address. Click “Advanced options” and check the box next to “Let me set up my account manually”. Click “Connect” to continue.


Step 4:

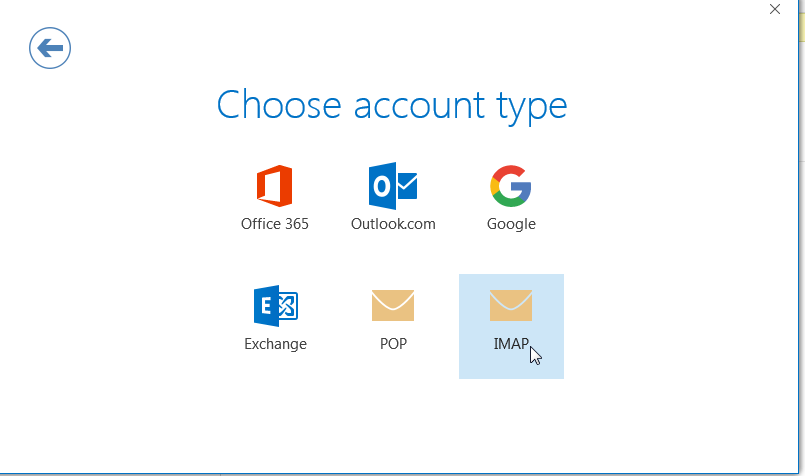
Click the “IMAP” account type box.


Step 5:

Have the mail server names assigned to your account handy. If you are not sure what they are ask up by clicking the “Help” button on the bottom right of this screen.

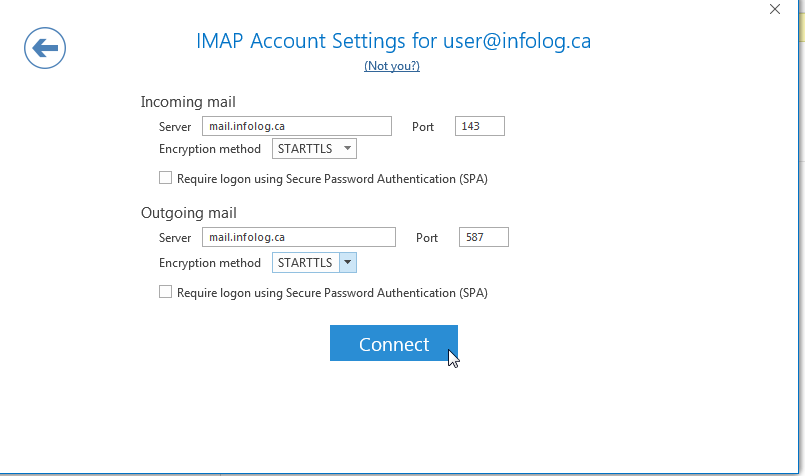
For “Incoming mail” fill in the server name, type in 143 for the port and select “STARTTLS” for the “Encryption method” dropdown.

For “Outgoing mail” fill in the server name, type in 587 for the port and select “STARTTLS” for the “Encryption method” dropdown.

This should look just like the image below, except you will use the server name assigned to your account. Then click “Connect”.


Step 6:

You will be prompted for your email account password. Make sure the “User Name” is the same as your email address. Click the “Save this password in your password list” check box and click “OK”.


Step 7:

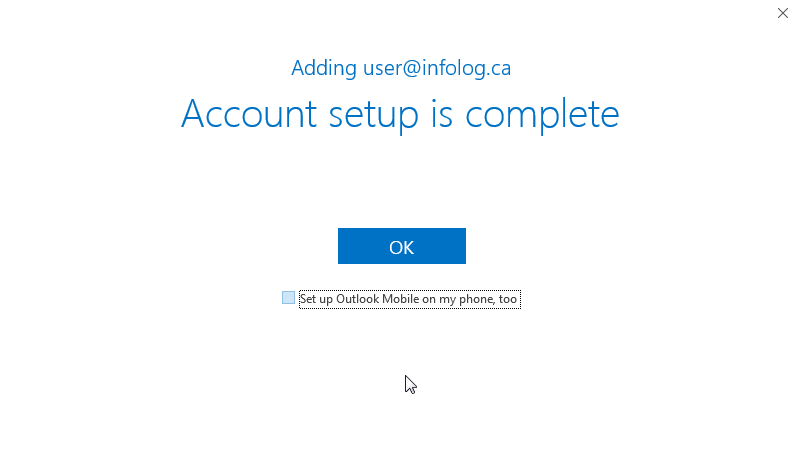
Woohoo! Success. Click “OK” to return to the Outlook main screen and send a test message. If you get any errors let us know by clicking the “Help” button at the bottom right of this screen.

Outlook 2016 POP3 Account Setup

Posted on November 7, 2017 by - Email Help

Here are the steps to setup a POP3 account in Outlook 2016. If you want to use IMAP instead you can use our IMAP Setup tutorial, but we are fans of the older, but more reliable Post Office Protocol (POP).

Step 1:

Open Outlook and click “File” from the main menu.


Step 2:

Click “Add Account”.


Step 3:

Fill in your email address. Click “Advanced options” and check the box next to “Let me set up my account manually”. Click “Connect” to continue.


Step 4:

Click the “POP” account type box.


Step 5:

Have the mail server names assigned to your account handy. If you are not sure what they are ask up by clicking the “Help” button on the bottom right of this screen.

For “Incoming mail” fill in the server name, type in 995 for the port and click the box next to “This server requires and encrypted connection (SSL/TLS)”.

For “Outgoing mail” fill in the server name, type in 587 for the port and select “STARTTLS” for the “Encryption method” dropdown.

This should look just like the image below, except you will use the server name assigned to your account. Then click “Connect”


Step 6:

You will be prompted for your email account password. Make sure the “User Name” is the same as your email address. Click the “Save this password in your password list” check box and click “OK”.


Step 7:

Woohoo! Success. Click “OK” to return to the Outlook main screen and send a test message. If you get any errors let us know by clicking the “Help” button at the bottom right of this screen.

Windows Live Mail POP Setup

Posted on May 15, 2017 by - Email Help

These settings will allow you to set up POP on your Windows Live Mail so that you can connect it to the server to download your mail.


  • Open Windows Live Mail
  • Add an email account
  • Select File from the menu at the top of the window
  • Select Options
  • Choose Email Accounts…
  • Select Add
  • Select Email Account
  • Enter the following information:
  • Email address: Your email address
  • Password: Your email password
  • Remember this password: Yes (add a check mark)
  • Display name for your sent messages: Your first and last name e.g. John Smith (or anything you want)
  • Manually configure server settings: Yes (add a check mark)
  • Select Next
  • Enter Incoming server information
  • Server type: POP
  • Server address: mail.infolog.ca
  • Port: 995
  • Logon user name: Entire email address (including the @example.com part)
  • Enter outgoing server information
  • Server address: mail.infolog.ca
  • Port: 587
  • Requires authentication: Yes (add a check mark)
  • Click Next and then Finish

Managing Good Mail in the Junk Folder

Posted on November 7, 2016 by - Email Help

Occasionally good mail will land in the Junk folder. Some Internet providers (especially telco and cable companies) have terrible IP address reputations. If you want to prevent a senders email from landing in the junk again here’s what you can do:

Step 1.

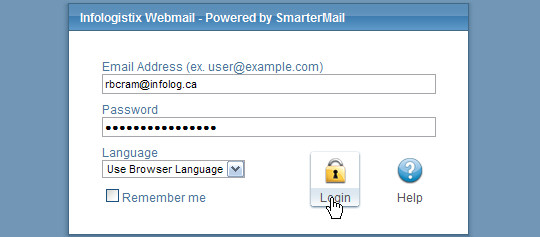
Log in to your webmail. Go to the junk folder. Select the good email:

step_1

Step 2.

Click on the “Actions” menu, hover over “Mark” and then select “Not Spam”:

step_2

This will do two things — 1. it will move the message to your inbox and 2. it will ensure this senders email goes straight to the inbox next time.

Setting up mail in iOS

Posted on March 18, 2015 by - Email Help

Setting up mail in iOS on your iPhone is usually pretty straightforward, but there are a couple of steps you might miss. One of them is including the outgoing password. Apple says it’s optional, but I can’t think of a provider where that is true. Make sure you see Step 5 and fill in the password field.

(more…)

I can’t click on links in webmail. What do I do?

Posted on November 28, 2008 by - Email Help

Your default view in webmail is set to plain text. That’s OK, it’s a best practice that prevents the automatic loading of remote images. Unfortunately it also renders links in the email unclickable. There is an easy fix. Just click on HTML in the View menu of a message display window (see the screen shots below)

(more…)